Mailozar is a powerful, self-hosted email marketing application that gives you complete control over your campaigns. While it offers a vast array of features, getting your first campaign out the door is straightforward if you follow the right steps.
This step-by-step guide will walk you through the entire process of creating, sending, and tracking a campaign within the Mailozar platform. Let’s dive in!
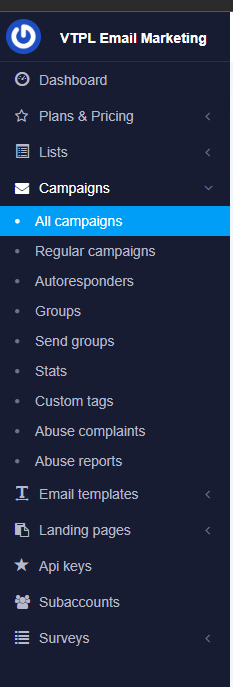
Step 1: Create Your Campaign and Complete the Setup Tab
Everything starts in your Mailozar dashboard.
- Navigate to Campaigns in the left-hand menu and click “Create new“.
- You’ll land on the Setup tab. This is where you’ll define the campaign’s core settings:
- Name: Give your campaign an internal name for your reference (e.g., “October Newsletter 2024”).
- List: Select the subscriber list you want to send this campaign to. You can also choose a specific segment of that list for more targeted messaging.
- From Name / From Email: Enter the name and email address your recipients will see.
- Reply-To Email: Specify the email address where you want to receive replies.
- Subject: Write your compelling subject line here.
- Preheader: Add the short snippet of text that appears after the subject line in the inbox.

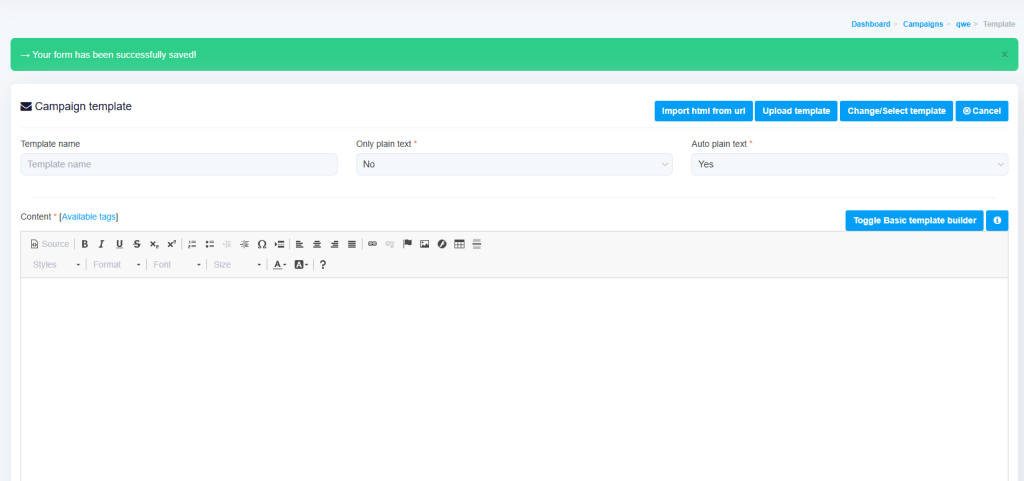
Step 2: Build Your Email in the Template Tab
After saving the setup details, you’ll be taken to the Template tab. This is where you design your email.
- Choose a Layout/Template: You can start from a pre-built template, one of your saved templates, or a blank slate.
- Use the Editor: Mailozar typically comes with a drag-and-drop editor. Use it to build your email structure.
- Stay On-Brand: Add your logo and use your brand’s colors and fonts.
- Add Content Blocks: Drag in blocks for text, images, buttons, and dividers to organize your content.
- Incorporate Visuals: Upload high-quality images or GIFs that support your message.
- Design for Mobile: Use the mobile preview option to ensure your design looks great on smaller screens.
- Create a Clear Call-to-Action (CTA): Your CTA button should be visually prominent. Use action-oriented text (e.g., “Shop Now,” “Read More”) and a contrasting color.
Step 3: Write and Personalize Your Content
With the design in place, it’s time to write the copy. Your content should be focused, valuable, and concise.
To personalize your email, use Mailozar’s available tags. These are placeholders that will be automatically replaced with subscriber data from your list.
Common Mailozar tags include:
[FNAME]for the recipient’s first name.[LNAME]for the recipient’s last name.[EMAIL]for the recipient’s email address.
An email that starts with “Hi, FNAME
!” is far more effective than a generic greeting.
Step 4: Add Recipients and Personalize
Once your email is ready, it’s time to choose who will receive it. This is where your list segmentation from Step 2 comes into play. Select the specific segment of your audience that this campaign is for.
Add a personal touch by using merge tags. These are placeholders (like *|FNAME|*) that your email platform will automatically replace with the recipient’s information, such as their first name. An email that starts with “Hi, Sarah!” is far more effective than one that begins with “Dear customer.”
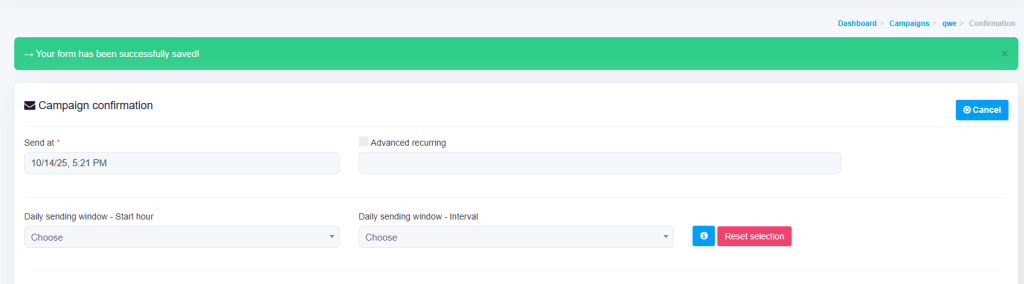
Step 5: Confirm and Send (or Schedule)
After saving your template, you’ll land on the Campaign Details & Send page. This page gives you a final overview of your entire campaign.
- Review Everything: Double-check the from name, subject line, chosen list, and estimated recipient count.
- Send a Test Email: Always send a test email to yourself or a colleague first. Open it on both desktop and mobile to check for typos, broken links, or formatting issues. Click every link to ensure it works correctly.
- Choose a Sending Time:
- Send it now: If you’re ready to go, you can send the campaign immediately.
- Schedule it: Select a future date and time for the campaign to be sent automatically. This is perfect for reaching your audience at the optimal time.

Once you’re confident, click “Send Campaign”.
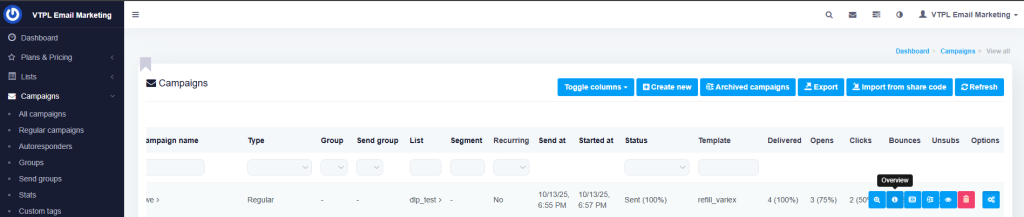
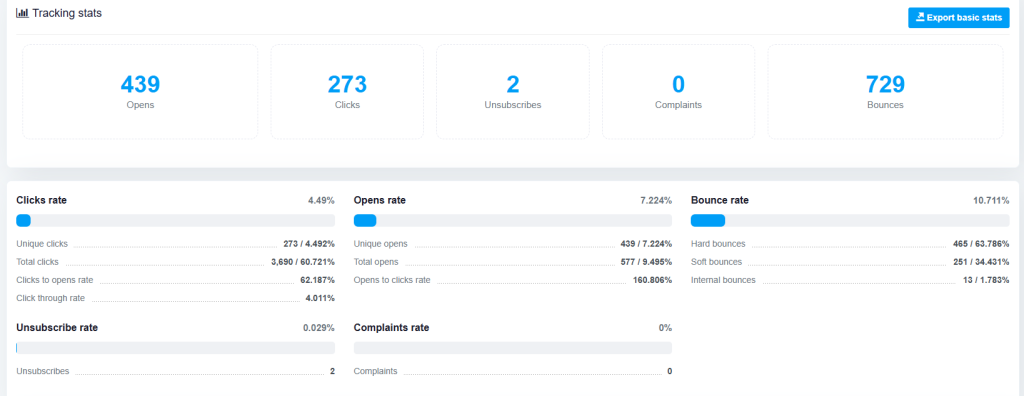
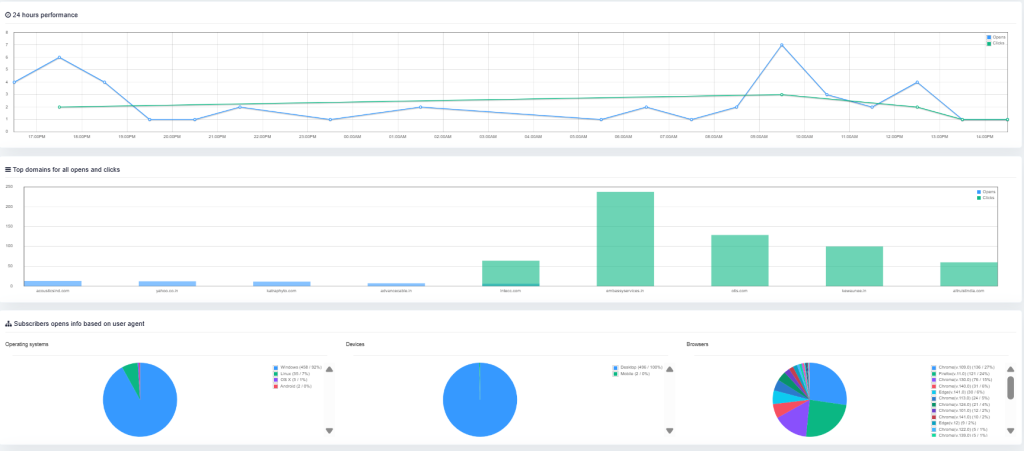
Step 6: Analyze Your Campaign Results
Your work isn’t done yet. Tracking your campaign’s performance is crucial for improving your strategy.
In Mailozar, go back to the Campaigns section to see your sent campaigns. Click on your campaign to view detailed stats:
- Open Rate: The percentage of recipients who opened your email.
- Click-Through Rate (CTR): The percentage of recipients who clicked a link. Mailozar can even show you a “click map” of where people clicked.
- Unsubscribe Rate: The percentage of recipients who opted out.
- Bounces: The number of emails that could not be delivered.
Use this data to understand what resonates with your audience for your next campaign.
Ready to Launch Your Mailozar Campaign?
Creating and sending an email campaign in Mailozar is a systematic process. By following these steps, you can leverage its powerful features to build a marketing channel that fosters customer loyalty and drives real business results.